


Fun EVA foam crafts … A cheap, very flexible nature and easy to handle and cut, a material that you can find anywhere. Eva foam or Eva rubber is a perfect raw material to spend hours making easy crafts. What is EVA rubber sheet used for? Is EVA safe for kids? We are going crazy about everything that can be done with it. In addition to being a resistant material it is great for making a lot of ideas.
EVA foam is a perfect complement to many other materials such as cardboard or wood sheets. If you want to be inspired, go ahead. Here you have 19 Easy EVA foam crafts for kids to entertain children and adults too.
But before we go on there are some tips and information you might be interested to know.
WHAT IS EVA foam?
EVA foam is a porous plastic material made up of a thermoplastic polymer that may be referred to as vinyl acetate modified polyethylene. This name in English gives rise to the acronym: EVA, which often referred to as foam rubber In other places.
It is normally found in the form of very thin sheets similar to cardboard but more polished in appearance and, having a smoother texture, although it is not paper and has a more flexible and stiffer texture than regular paper.
EVA foam is a relatively new material for constructing costumes and props of all different kinds thus introduced in a very strong way in the world of crafts.
CHARACTERISTICS OF THE RUBBER EVA
EVA foam has a series of characteristics that make it a great material for constructing and making crafts and therefore it became essential in any basic craft kit. EVA foam is a very Healthy friendships material with flexible character, ideal for working with kids of different ages as it is pleasant to the touch and can be handled very easily.
It is also available in a wide range of color sand finishes available; it is non-toxic, produces very low levels of odor. and can be recycled. It is light and almost waterproof and can be washed in the washing machine, making it easier for making complements and accessories for children’s inexpensive EVA foam Halloween costume ideas.
What are the different types of EVA foam?
There are 3large groups according to their texture properties and understanding the differences helps to choose as they are worked. While one is like felt sheets being dry in a way, the other type of Eva foam has some elasticity, something like plasticine or molding pastes.
There is also chip foam which is completely solid. And so that you understand it better, we are going to see exactly some of their differences:
-
Eva foam in sheets.
Eva foam sheets are available in various colors and finishes. They are normally quite large plates in many different densities and forms in standard formats. They are normally found in A4 and A2 format like cardboard sheets and available in 2mm, 4mm, 8mm, and 10mm.
On the market there is a wide assortment of plain colors, or with printed, glitter, wavy or other textures. Also, adhesive EVA foam sheets are available. With all these wide variety of types that exist, selecting a certain project is much easier.
-
EVA foam in chips
This type of EVA foam is sold in the form of chips and is ideal for Architecture Models and perfect for models that seek to imitate earth or grass.
-
Moldable Eva foam.
Moldable EVA foam has become very popular in recent years. In addition to being very easy to work with, it molds well, making it easy for us to create the perfect design, As it offers great results with lots of features that you will surely love if you don’t know it.
Is EVA foam safe for kids?
Eva foam is non-toxic and does not stain, making it perfect for working with kids. The Moldable Eva foam technique is very simple, it molds easily as if it were plasticine, and it also allows you to mix 2 or several colors with each other and paint to obtain new tones in our work.
Once the project is finished, it dries within 24 hours in the open air to form a spongy consistency similar to EVA foam sheets but in the shape that we have given it forever.
The Benefits and Uses of EVA Foam
Eva rubber sheets are common to find, and very easy to work with. Thanks to its flexibility, it can be manipulated in a very comfortable way, easy to cut and paste.
Heat is necessary to shape EVA foam. It can be shaped and make details on the surface by making marks or textures and when it cools it holds its shape permanently.
Eva rubber is very similar to felt but does not require sewing. To join pieces use silicone to adhere the pieces together.
EVA foam crafting tools and supplies – A Must-Have for DIY Projects! 🎨✨
EVA foam is a crafter’s dream—lightweight, flexible, and easy to shape! Whether you’re making cosplay armor, school projects, or fun decorations, the right EVA foam crafting tools and supplies make all the difference. 🛠️🎭
Essential: Pencil and ruler for greater precision when carrying out our projects
To glue: Silicone is the key to joining pieces.
To cut: Scissors, die cutters or cutters.
To decorate: Markers or acrylic paints or 3D paints.
To shape: use heat applicators such as dryers or irons.
6 tips for working with modeling EVA foam crafts
If you want to make awesome Eva foam crafts and due to its appearance similar to plasticine there is not much mystery. There are certain tips for working with modeling EVA foam crafts you need to know how to take advantage of the different versions of modeling clays.
The first thing is to choose the type of Eva foam that you want to use according to the type of craft to be made. Below are the best 10 tips for working with EVA foam:
- Consider age and abilities: easy art craft can bring children a funny Thus, choose EVA foam craft projects that are suitable to your kids’ age and developmental level. This makes crafting time fun. Avoid projects that are boring, either too complex or too simple.
- Set up a workspace: make sure that your child has a little space in your home for crafting, with all the necessary materials within easy reach. The workspace should be smooth as possible, like glass, marble or methacrylate is normally used.
- Cleaning, an ally of EVA foam; Another point to keep in mind before starting to work is that the work surface, the utensils, any equipment’s, and your hands must be perfectly clean before beginning a new project.
We must also keep in mind to wash our hands after molding Eva foam with every color change to avoid bleeding colors.
- Use child-safe scissors: cutting skills are crucial for children. So, if they are using scissors, provide them with safety or training scissors with blunt-edged and under your supervision. Teach them safe cutting activities to young children.
- Use appropriate gluing: EVA rubber may not adhere well with all types of gluing. Look for safe and suitable adhesives that work well with the material.
- Explore colors and textures: EVA foam comes in many colors and textures. A good tip is while modeling different colors is to use the lighter ones first by this technique, they prevent the light colors like white to get dirty. With different color combinations they can create unique designs.
What can you make with EVA?
Eva foam is a versatile and easy-to-use material for crafts. It can be used to make a variety of projects starting from simple to complex ones. Making EVA foam craft ideas for kids are a safe material to deal with and to work with or to make EVA foam home decor crafts and decorative projects. Here are some inspiring craft projects for different ages.
Easy Eva foam crafts… 19 fun ideas!
Best EVA foam crafts for beginners
Getting started with EVA foam crafting. This material is perfect for creating beginner-friendly projects that are both fun and rewarding!
EVA rubber figures
With the remarkable color of Eva foam which gives them a wide application for creating fun activities are a wonderful idea. This safe EVA foam material is soft can be used by children to make unlimited toys in what figure they like. via msstephaniespreschool.com.

Elegant EVA Foam Flower Gift Box wrapper
This stunning EVA foam flower gift box is both elegant and functional! The delicate pink petals and green leaves create a beautiful floral base, making it an ideal choice for special occasions like weddings, birthdays, baby showers, or Mother’s Day.
Made from lightweight and durable EVA foam, it’s a unique, handmade alternative to traditional gift wrapping. Whether as a keepsake or a decorative piece, this floral-inspired packaging is sure to impress!
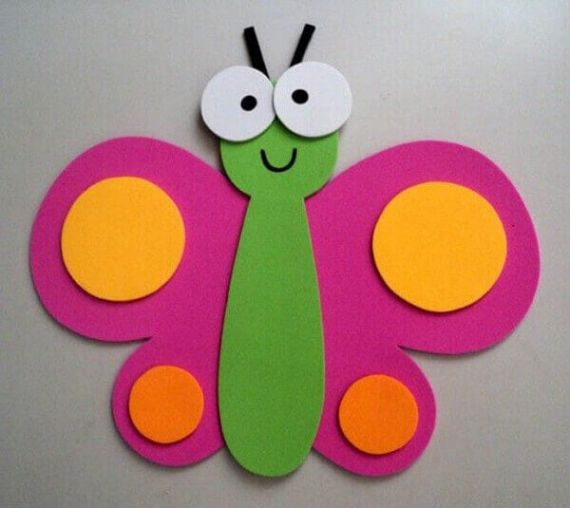
Bright & Fun EVA Foam Butterfly – A Perfect Kids’ Craft!
This EVA foam butterfly craft is a fantastic project for kids! With its vibrant pink wings, orange spots, and a cheerful green body, it’s a great way to introduce children to crafting, color recognition, and hand-eye coordination.
The simple cut-out design makes it easy for preschoolers and elementary-aged kids to create their own adorable butterflies.
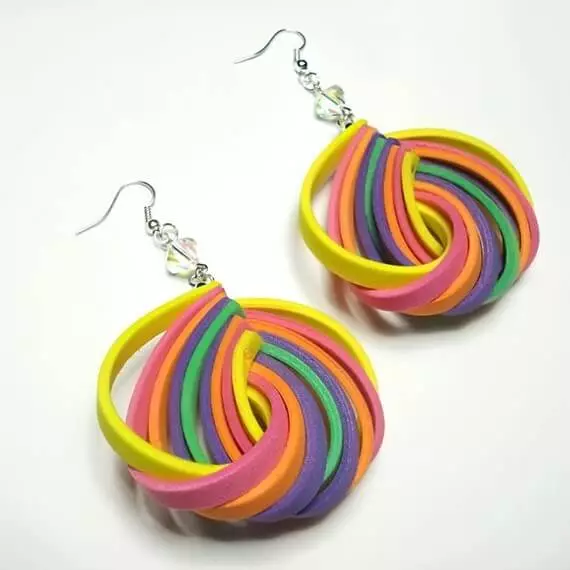
Stylish & Lightweight EVA Foam Earrings
These EVA foam earrings are a perfect blend of style and creativity! These earrings are ideal for craft lovers, DIY jewelry makers, and unique fashion enthusiasts. Whether for casual wear, parties, or handmade gifts, they bring a bold and playful statement to any look! Via: Bibi Morbide Creazine.
EVA foam art projects
EVA foam is a fantastic material for crafting stunning art projects! EVA foam offers endless creative possibilities Ideal for beginners and experienced crafters alike, EVA foam turns simple ideas into eye-catching masterpieces.
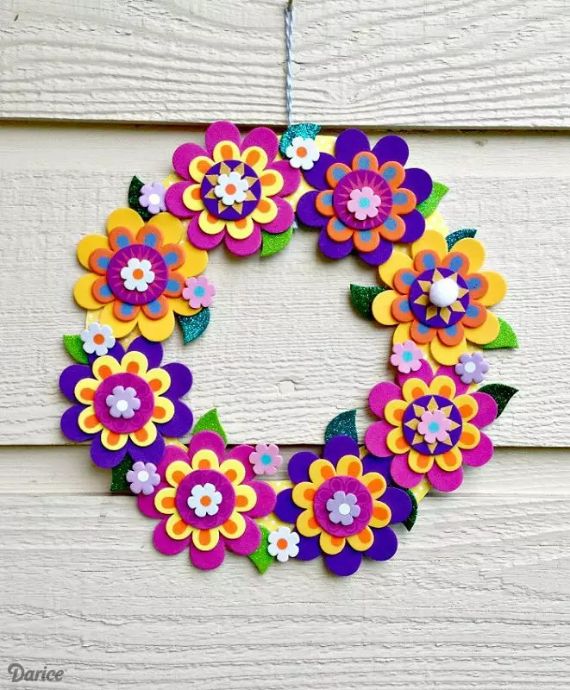
Eva foam flower wreath
The process of making Eva foam flower wreath wasn’t difficult, but it required more time and lots more felt flower, but the result is amazing. This is a super fancy Wreath is one fun and easy project to make and decorate your front door on many occasions to come. EVA foam crafting tutorials are available. Via: Darice
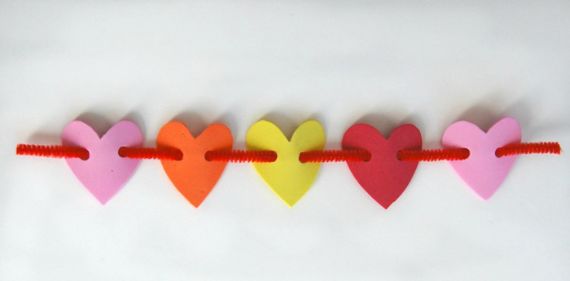
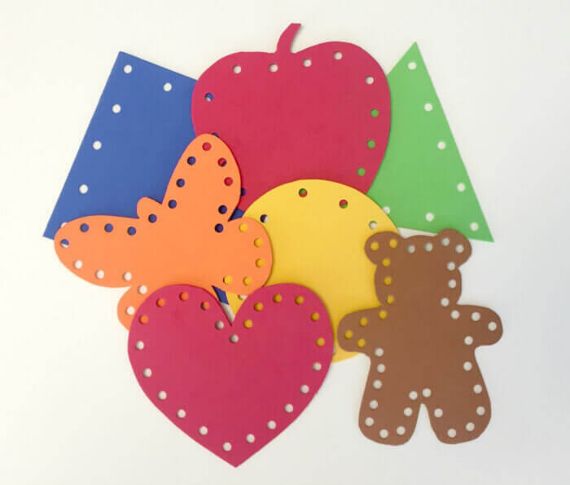
Threading EVA rubber with pipe cleaners
EVA rubber crats make us appreciate getting a chance to sit still and focus on something that challenges children’s minds in a different way. One of these crafts which the child can get real excited about these days are threading with pipe cleaners and heart shaped craft made of rubber foam.
It’s such a simple activity, yet it can entertain your child for up to 30-40 minutes at a time…via msstephaniespreschool.com
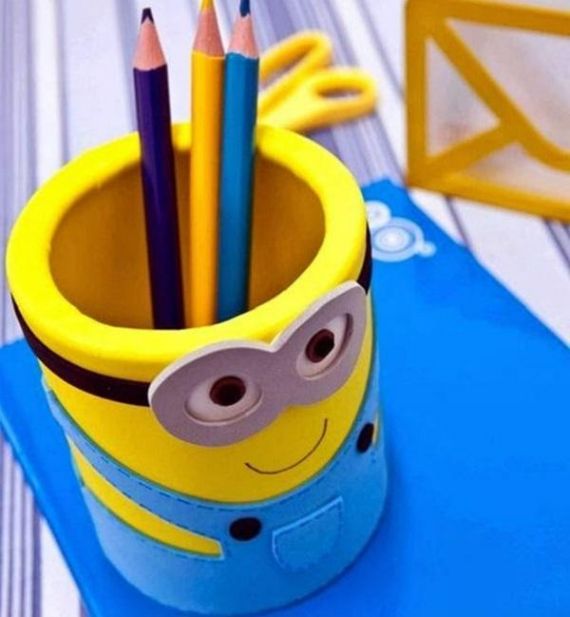
Eva rubber Pencil holders
DIY tutorial about making the organizer pencil case from scratch easy. You can use this organizer for keeping all your office or school. Now you have a cute and functional pencil holder that will help keep your children’s colored pencils organized and easily accessible. Enjoy this craft project with your little ones! Via maynterest channel.
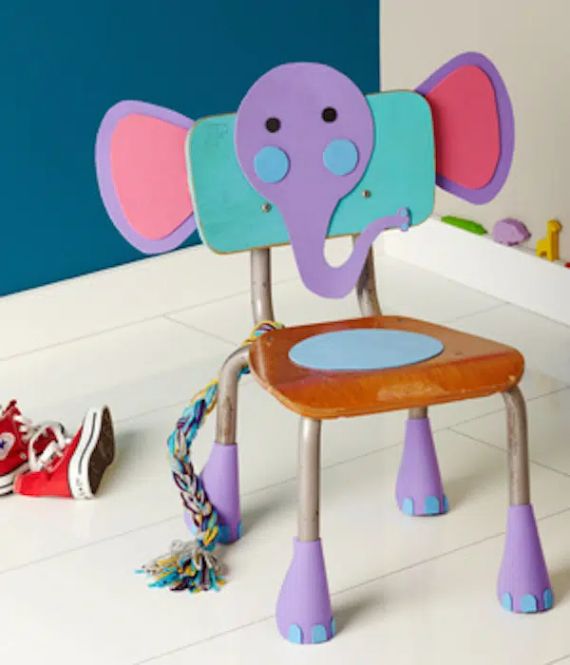
EVA Foam Elephant Chair
This EVA foam-decorated chair is a creative and playful way to transform an ordinary seat into a fun, kid-friendly masterpiece! The adorable elephant design, complete with oversized pastel ears, a curved trunk, and matching foot covers, adds a charming touch to any child’s room or play area.
The braided tail detail brings extra personality, making this a delightful DIY craft project. EVA foam is lightweight, easy to work with, and durable, ensuring both comfort and style. Perfect for kids who love animals and creative décor!
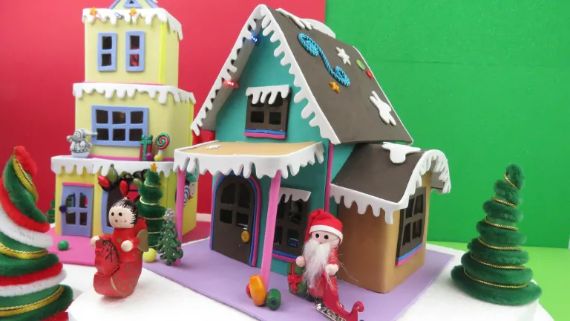
Festive EVA Foam Christmas Houses 🎄🏡
These EVA foam Christmas houses – A Delightful DIY Craft! are a charming and creative holiday decoration! Made with colorful EVA foam, they capture the magical essence of Christmas while being lightweight and durable.
Perfect for holiday displays, classroom projects, or festive centerpieces, these miniature houses bring joy and warmth to any setting. Their detailed design with snowy rooftops, Santa figures, and candy-inspired elements makes them a great alternative to gingerbread houses—without the mess! Whether for kids’ crafts, home décor, or gifts, these houses add a whimsical touch to the holiday season. 🎅✨
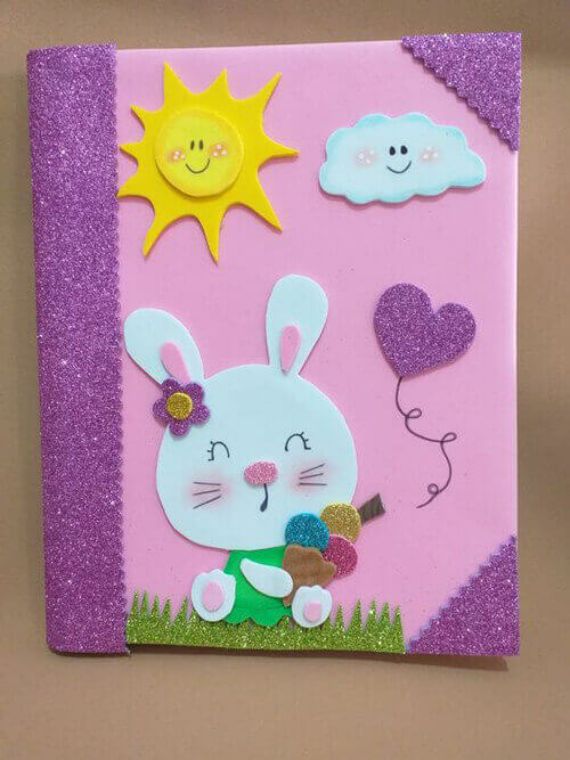
Adorable EVA Foam Notebook Cover
This EVA foam notebook cover is a cute and fun way to personalize school supplies! Featuring a charming bunny design with a glittery finish, it adds a touch of whimsy and joy to any notebook. The soft and durable EVA foam protects the notebook while keeping it lightweight and stylish.
Perfect for kids, students, or DIY lovers, this cover is ideal for school, journaling, or scrapbooking. The bright colors and playful details make it an excellent gift or craft project. A creative way to make learning more fun!
Easy EVA foam crafts for kids 🎨✂️
EVA foam crafts for kids are the perfect way to encourage creativity! From colorful masks, cute animal cutouts, and fun puppets to easy DIY stickers and 3D flowers, the possibilities are endless. EVA foam is soft, flexible, and easy to cut, making it safe for little hands. Kids can decorate with glitter, googly eyes, and markers to make their projects unique. EVA foam crafts guarantee hours of creative fun!
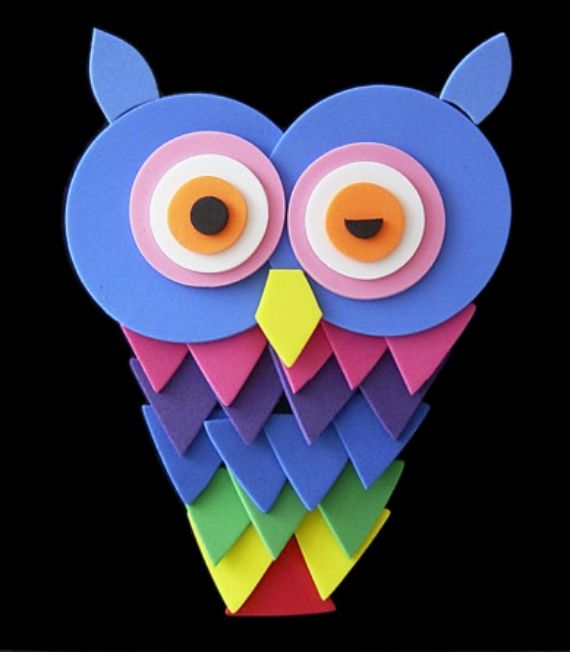
Eva foam owl
Eva foam is very light to work with. This is a super cute and quirky DIY Owl that is made using just colorful sheets of Eva foam and craft foam sheet. You can use this DIY owl as a decorative item. It is super easy to make and budget friendly too.
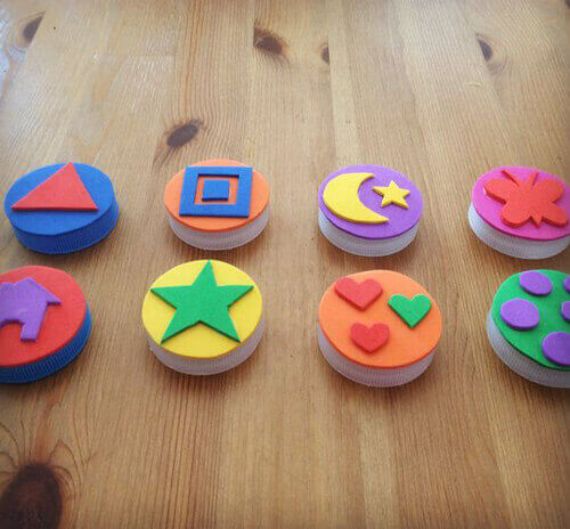
DIY EVA Foam Stamps
This is another fun and super exciting DIY EVA Foam craft project. Here is how to make DIY Eva Foam Stamps! This fun craft goes by discovering a new world of craft making and new opportunities will open up for you. And whenever you find an inspiring stamp image, Eva Foam material will spark your creative flow to create it.
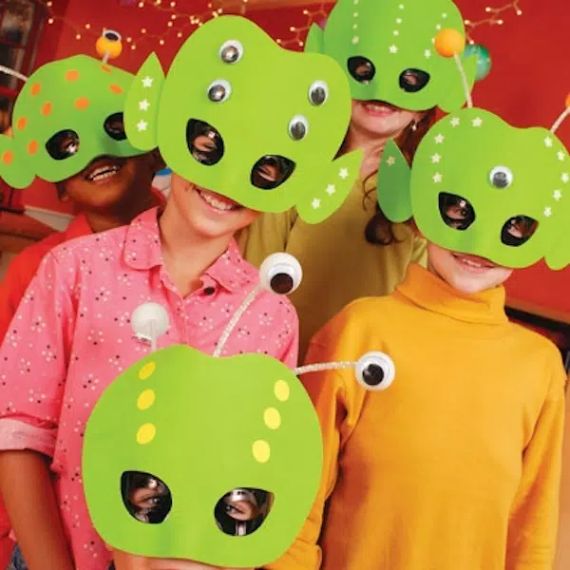
Eva Foam Masks:
With so many different designs out there on the internet this is a super fun and easy to make Eva Foam Mask: download the desire shape and cut, decorate and glue if necessary.
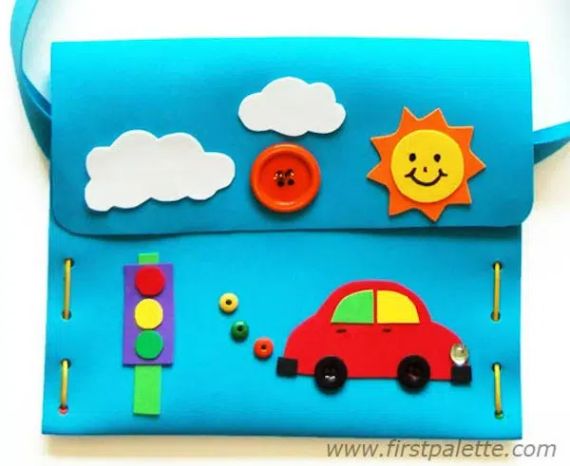
Eva rubber bag
This simple school bag for children is made from a colorful waterproof EVA rubber which can be messy but cleans up. It’s totally impractical, but super fun and was far easier to do. You can find detailed step-by-step imagess in the link provided below the image.
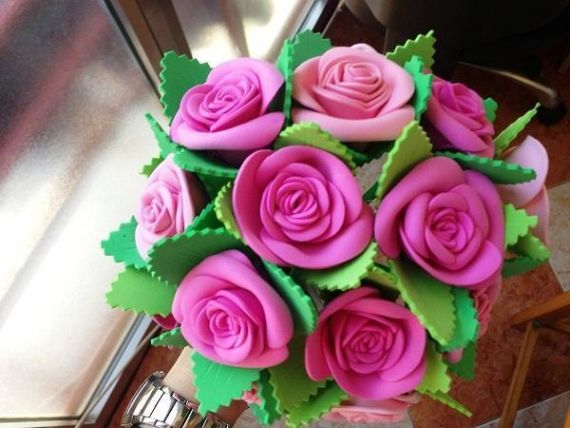
EVA rubber roses
DIY flowers making is an art. But with Eva foam roses it is something special. Follow step-by-step DIY crafts instructions by Colors Paper to create stunning roses. These elegant blooms are for decoration purpose or as gifts on many occasions to the loved ones, adding a touch of handmade charm to any setting.
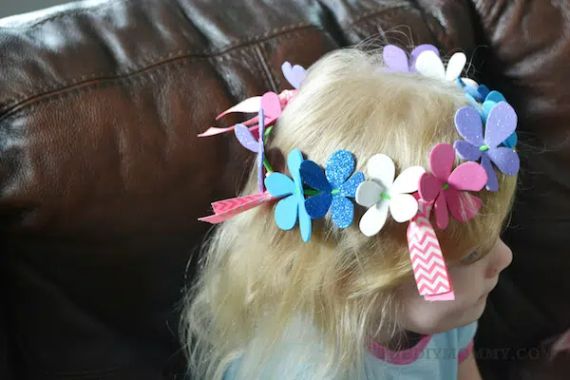
Eva rubber flower headband
Find how to make an Easy and beautiful flowers headband ideal for children’s parties, dress-up, or playtime. Thus, Cute hair accessories consists of adorable rubber flowers crafted from colorful Eva foam. Use multiple pipe cleaner to add each segment. Use as many colors as possible whatever color scheme available.
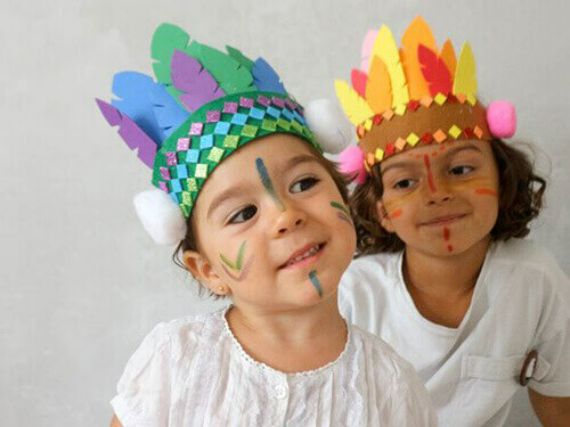
EVA rubber crown
Eva foam is a surprising material. Many kinds of crafts are available through these colored sheets. They are very quick to make, allow thousands of customizations and I assure you that you will have hours and hours of fun at home. They are perfect for a birthday party or as a Halloween costume.
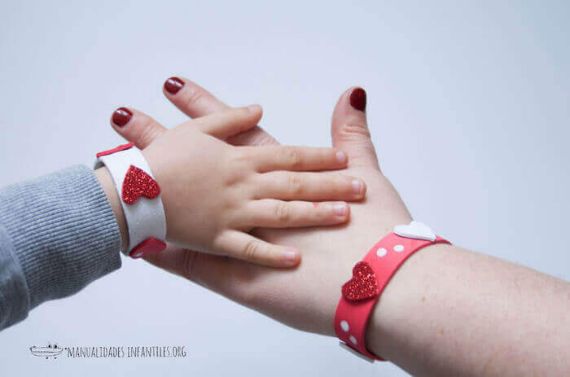
DIY EVA Foam Bracelets ❤️✨
These EVA foam bracelets – A Heartfelt Craft are a fun and creative way to make matching accessories for parents and kids!
The cute heart details and polka dots make them an adorable gift for Valentine’s Day, Mother’s Day, or friendship bracelets. Ideal for school projects, DIY activities, or party favors, these bracelets are easy to make and personalize. A beautiful symbol of love and connection in a handmade way!
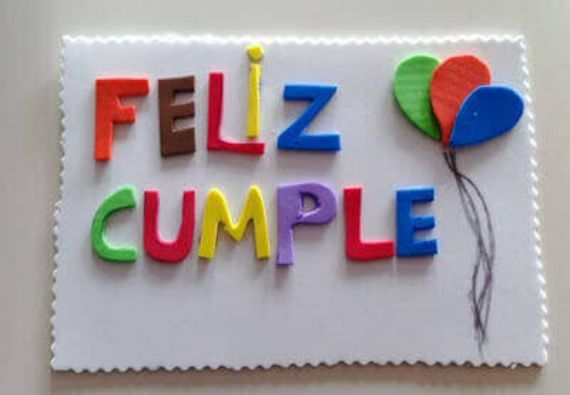
Greeting Colorful EVA Foam Birthday Card
This EVA foam birthday card is a fantastic way to add a personalized and creative touch to any celebration! The vibrant 3D letters and balloon details make it a fun and eye-catching design.
EVA foam is a fantastic material for crafting, offering endless possibilities for fun EVA foam crafts. Whether you’re making masks, flowers, or home decor, these projects are perfect for beginners and kids. With the right tools and a little creativity, you can create stunning DIY EVA foam projects that everyone will love.


 Ideas for Wonderful Halloween day")
